

Introduction
Utilizing BastionZero for providing secure access control to Kubernetes clusters is a game-changer as it empowers your teams (and service accounts) to access the API in a zero trust manner while keeping your Kubernetes API off the public internet. BastionZero bolsters Kubernetes data protection while eliminating the technical debt associated with long-lived credentials, privilege creep and lack of observability (where you can’t tell who has access to what parts of the cluster, or what they did with that access).
Deploying BastionZero with Kubernetes provides robust protection against unauthorized access and data breaches while streamlining access management. Whether you're looking to bolster your security posture, simplify remote access or achieve regulatory compliance, BastionZero provides a comprehensive solution through its user-friendly and easy-to-deploy platform. That’s not all — the BastionZero platform is the only access solution on the market that doesn’t require privileged access to your cluster. This means you can rest easy, knowing that a compromise of the BastionZero service won’t lead to a compromise of your Kubernetes cluster.
Setting Up Kubernetes Access Control with BastionZero: A Walkthrough
1. Preparing Our Account
For the purposes of this post, I’ll assume you have already signed up for a BastionZero account, have your BastionZero account integrated with your IDP and have BastionZero's command-line interface, the Zero-Trust Command-Line Interface (ZLI), installed on your local machine. I’ll also assume you have a Kubernetes cluster deployed that you’d like to access using BastionZero. We’ll do a few things in our BastionZero account to set ourselves up for success as outlined below:
- Log into the BastionZero web interface at cloud.bastionzero.com.
- Create a registration key.
- (optional) Create an environment which we can associate our targets with.
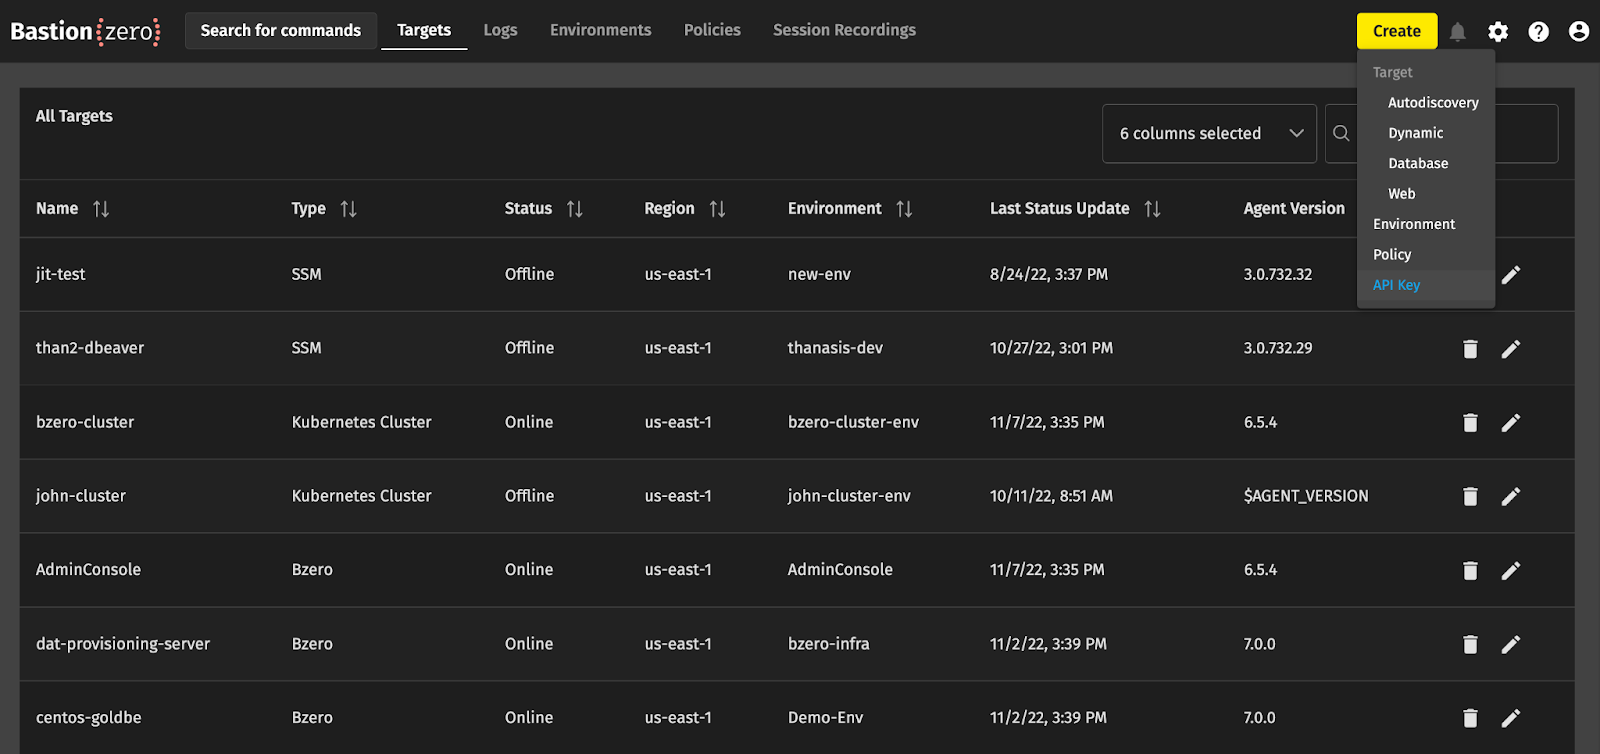
We can grab a registration key from the BastionZero web interface at cloud.bastionzero.com. Once you sign in, select "Create" in the upper right hand corner and choose "API Key."
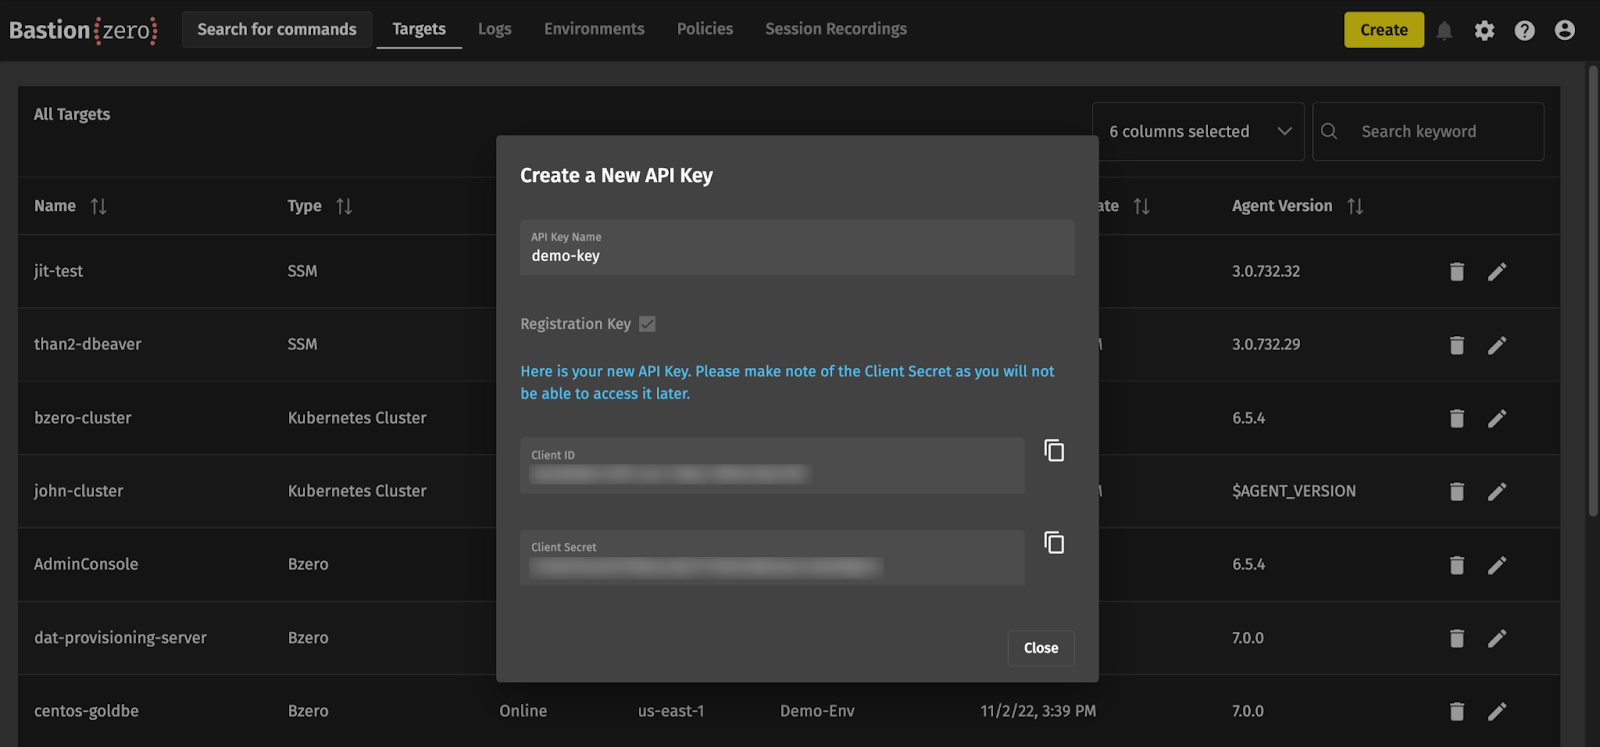
For Registration keys, you must select the Registration Key box below the name field. Clicking "Generate API Key" will then display the new registration key ID and secret. Hang onto this secret for later! It won’t be available in the UI again once you close the dialogue.
After we have generated our registration key, we can optionally create an environment to associate our targets with. Creating an environment will allow us to group targets together so that later we can manage access policies more efficiently. When you bring up a target, you can associate it with an environment that should give access to anyone who has been granted permissions to that environment.
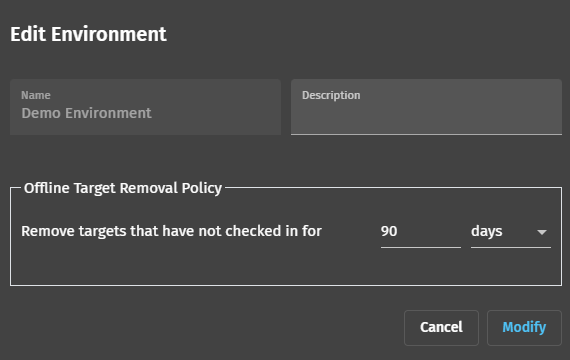
We’ll once again hit “Create” in the top right corner and select “Environment.” Give this environment a name (I’ll be using “Demo Environment” for this guide) and a description. You can configure the BastionZero platform to automatically remove offline targets after a certain period, which I’ve set to 90 days in this case.
After the environment has been created, you’ll want to find its UUID and save this for later. You can do this by checking the “Display: UUID” box and making anote of the new environment’s UUID.

We’re now ready to install the agent into our cluster! We should have both our registration key and optional environment UUID at hand. If you’d like, we can set these as environment variables ahead of time using something like:
2. Installing the BastionZero Agent into Your Cluster
There are a number of ways we can install the BastionZero agent on our target. The primary installation methods are described here. For this blog post, we can take advantage of the Helm package manager for installation.
Let’s install the BastionZero agent into your cluster using Helm. We’ll need to set a few environment variables ahead of time: our Registration Secret, our Environment UUID and a given name for the cluster in question. An example of this is above.
1. Add the BastionZero repo:
2. Install the Helm chart:
You should be greeted with a prompt confirming success! Check that the target has become available in the web interface’s Targets section.

3. Configuring Policy
Before connecting to our new cluster through the ZLI, we need to create an access policy that allows us to assume a role on our target. We’ll point our browsers to the Policy section of BastionZero’s web interface and once again click “Create” in the top right hand corner. We can then build an access policy for our new target.
- Policy Type: Use “Kubernetes” which denotes the policy enables access to a cluster.
- Users: Select yourself here.
- Environment: Select test-environment (or, if you skipped creating an environment, click “Targets” and select your registered cluster here).
- Allowed Target Users: Select which roles you’d like to be able to assume on the target. You may want to include cluster-admin, or any role you can assume in the cluster that has permissions to perform the operations you need.

Click “Save." You should now be ready to connect to our cluster!
4. Connecting to your BastionZero Target Using the ZLI
Let’s head to our terminal and substantiate a connection to our new target. You can log in to the ZLI using the zli login command.

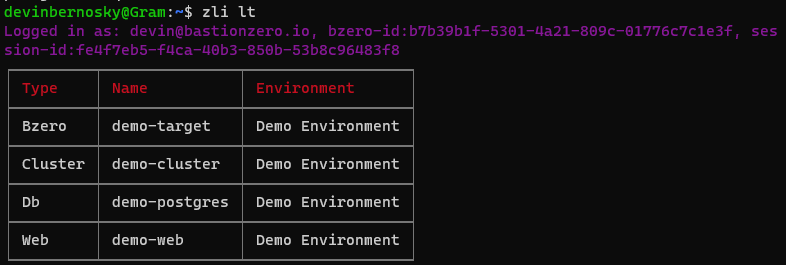
Once you’re logged in, you should run the zli lt command to check which targets are registered and available for connection.
We can then connect to our Kubernetes cluster! Run zli connect *clustername*

This will add the necessary information required to connect the Kubernetes cluster to your /.kube config file normally found in your home directory. At this point you should be able to use tools like kubectl right away. Test with kubectl get pods -A:

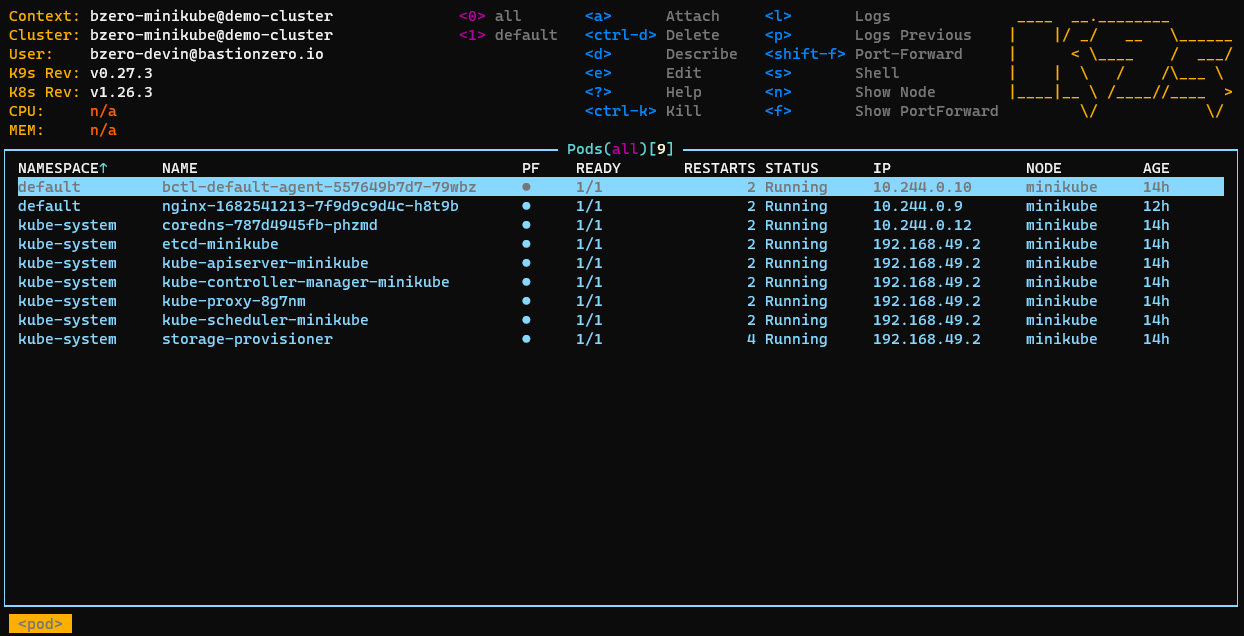
Tools like k9s and lens should also work straight away:
5. Troubleshooting
If you still can’t connect to your cluster, you may need to modify permissions for the target Kubernetes user you’re logging in as. For this guide, we’ve logged in as “cluster-admin” but you may wish to create a new user to impersonate. If you can’t seem to connect with your user, try ensuring that the user has the necessary permissions to do things like get, list and watch certain resources.
To do that, create a ClusterRole with the necessary permissions for your user; I’ll use "devin" for this example. Create a YAML file named devin-clusterrole.yaml with the following content:
This ClusterRole allows the user "devin" to get, list and watch pods or services in any namespace. You can modify the resources and verbs according to the specific permissions needed.
Apply the ClusterRole with the command:
Now, create a ClusterRoleBinding to bind the user "devin" to the ClusterRole you just created. Create a new YAML file named devin-clusterrolebinding.yaml with the following content:
Apply the ClusterRoleBinding with the command:
Once the ClusterRole and ClusterRoleBinding are applied, the user "devin" should now have the necessary permissions to get, list and watch pods in any namespace.
If you only want to grant these permissions for a specific namespace, replace the ClusterRole and ClusterRoleBinding kinds with Role and RoleBinding, respectively, and add the namespace field to the metadata sections in both YAML files.
Remember to test the kubectl get pods -A command with the user "devin" again after applying these changes to see if the issue has been resolved.


