

Jump hosts elicit a variety of strong feelings from engineers. Here are some things my team at BastionZero has heard from customers over the years.
“I manage a bunch of bastion hosts that keep me up at night.”
“I [just] discovered an SSH bastion ... that is on the public internet today. It was added to my SSH config on day 1 so I completely forgot it was there ... While digging [around my infrastructure] I realized there is a lot of complexity there and a fair bit of risk …”
“We have a standing access bastion with a PAM Module on each remote host. I have to do authentication each time I log into a target. Can you imagine what that is like if I have to log into many targets in a row? It is horrible.”
It doesn’t have to be this way. You can provision your engineers with access to your Linux hosts without losing sleep at night or harming the productivity of your developer teams.
Access Architecture
Let’s start by considering how we want to architect our access in the context of jump hosts. We can approach access architecture in a couple different ways:
- Use BastionZero to improve the way we access our current jump host by installing the BastionZero agent on our current jump host
- Install the BastionZero agents on the targets we normally access through the jump host and do away with the jump host
We’ll be covering the first option in this blog post. While the first option is generally easier to test, since it only requires a single installation of the BastionZero agent, we won’t be able to benefit from the full suite of features BastionZero has to offer. The first option may be enough if all you need is to manage SSH keys and log access, or if you just want to remove your jump host from the public internet.
More granular access control, increased security, and significantly better logging are unlocked by doing away with jump hosts altogether and deploying BastionZero agents directly on target systems as described in option 2 above. We’ll cover that option in our next blog.
Preparing our Account
For the purpose of this post, I’lll assume you have already signed up for a BastionZero account, have your BastionZero account integrated with your IDP, and have the ZLI installed on your local machine. Let’s do a few things in our BastionZero account to set ourselves up for success.
- Log into BastionZero web interface at cloud.bastionzero.com
- Create a registration key
- (optional) Create an environment which we can associate our targets with
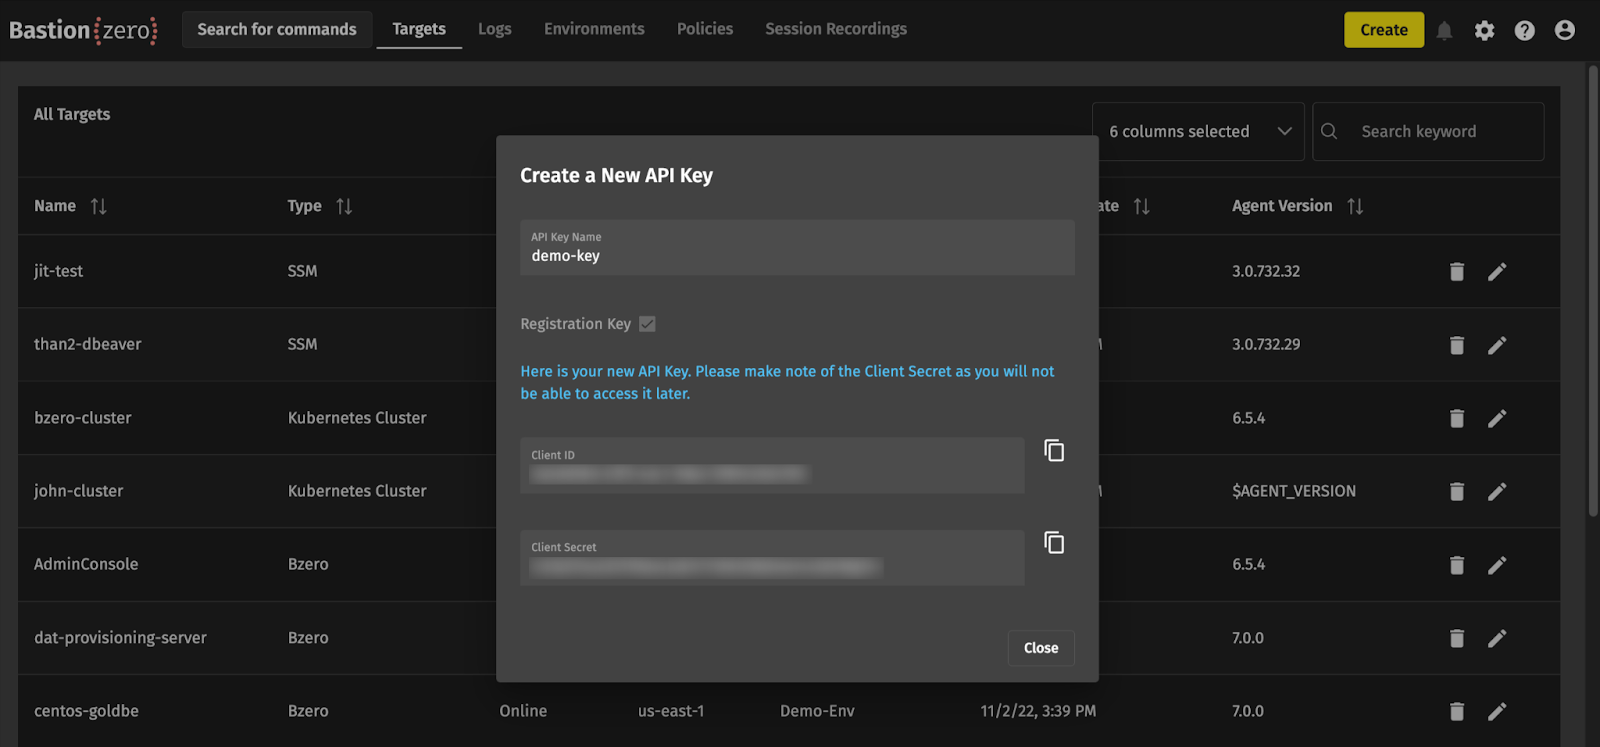
We can grab a registration key from the BastionZero web interface at cloud.bastionzero.com. Once you sign in, select "Create" in the upper righthand corner and choose "API Key."

For Registration keys, you must select the Registration key box below the name field. Clicking "Generate API Key" will then display the new registration key ID and secret. Hang onto this secret for later! It won’t be available in the UI again once you close the dialogue.
After we have generated our registration key, we can optionally create an environment to associate our targets with. Creating an environment will allow us to group targets together so that later we can manage access policies more efficiently; when you bring up a target, you can associate it with an environment which should give access to anyone who has been granted permissions to that environment.
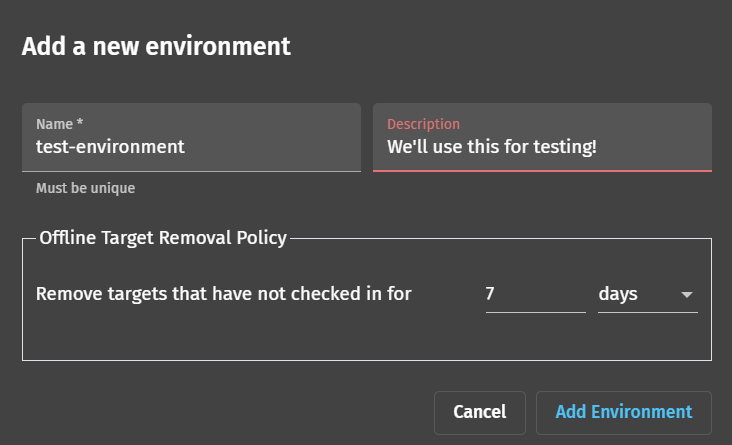
We’ll once again hit “Create” in the top right corner and select “Environment”. Give this environment a name (I’ll be using “test-environment” for this blog) and a description. You can configure the BastionZero platform to automatically remove offline targets after a certain period, which I’ve set to 7 days in our case.
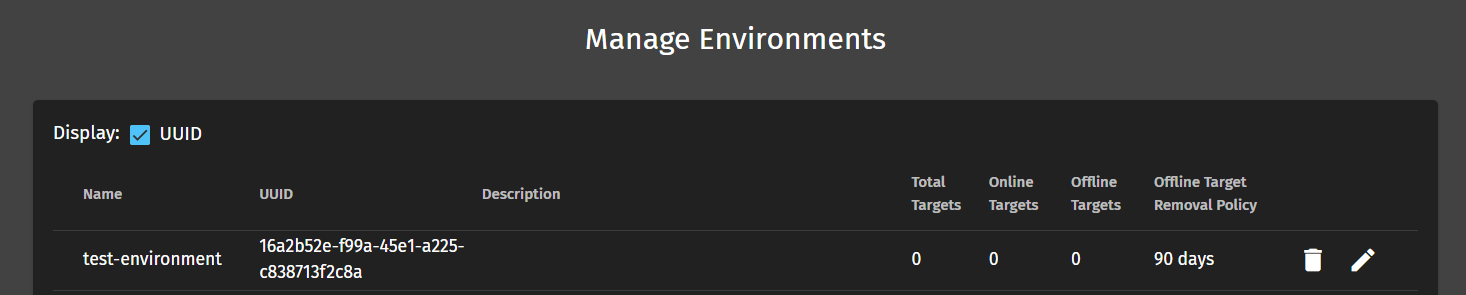
After the environment has been created, you’ll want to find its UUID and save this for later. You can do this by checking the “Display: UUID” box and making note of the new environment’s UUID.
We’re now ready to install the agent on our jump host! We should have both our registration key and optional environment UUID at hand.
Install the BastionZero Agent on your jump host
There are a number of ways we can install the BastionZero agent on our jump host. Of note, you can install BastionZero alongside any current access technologies (like SSH) without issue. The primary installation methods are described here. For this blog post, we’ll assume you’re using a Debian based operating system for your jump host. We can take advantage of the Apt package manager for installation.
Let’s install the BastionZero agent on our Jump Host. Gain access to your jump host as a user with root privileges and run the following commands:
- Install the BastionZero public key from the Ubuntu key-server:
sudo apt-key adv --keyserver keyserver.ubuntu.com --recv-keys E5C358E613982017
- Add the BastionZero repo:
sudo add-apt-repository 'deb https://download-apt.bastionzero.com/production/apt-repo stable main' - Update the apt cache:
sudo apt update - Install the agent bzero:
sudo apt install -y bzero - Register your agent:
sudo bzero -registrationKey *registration key secret* -environmentId *UUID* -targetname *nameyourtarget*
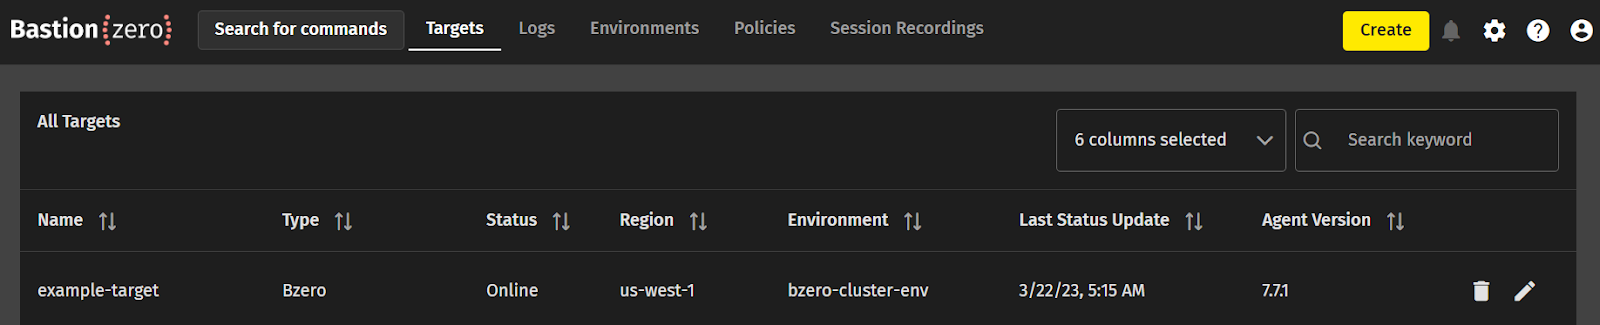
You should be greeted with a prompt confirming success! It’s as easy as that. Check that the target has become available in the web interface Targets section.
Configuring Policy
Before connecting to our new target through the ZLI, we need to create an access policy which allows us to assume a role on our Jump Host. We’ll point our browsers to the policy section of BastionZero’s web interface and once again click “Create” in the top right-hand corner. We can then build an access policy for our new target.
- Policy Type: use “Target Access” which allows us to login directly to the target
- Policy Action: use the “Shell” action to allow us to log in with the ZLI, and the “SSH Tunnel” action for SSH tunneling.
- Users: select yourself here
- Environment: select test-environment (or, if you skipped creating an environment, click “Targets” and select your registered target here)
- Allowed Target Users: select which roles you’d like to be able to assume on the target. You may want to include root or the user you logged into as when installing the agent above.
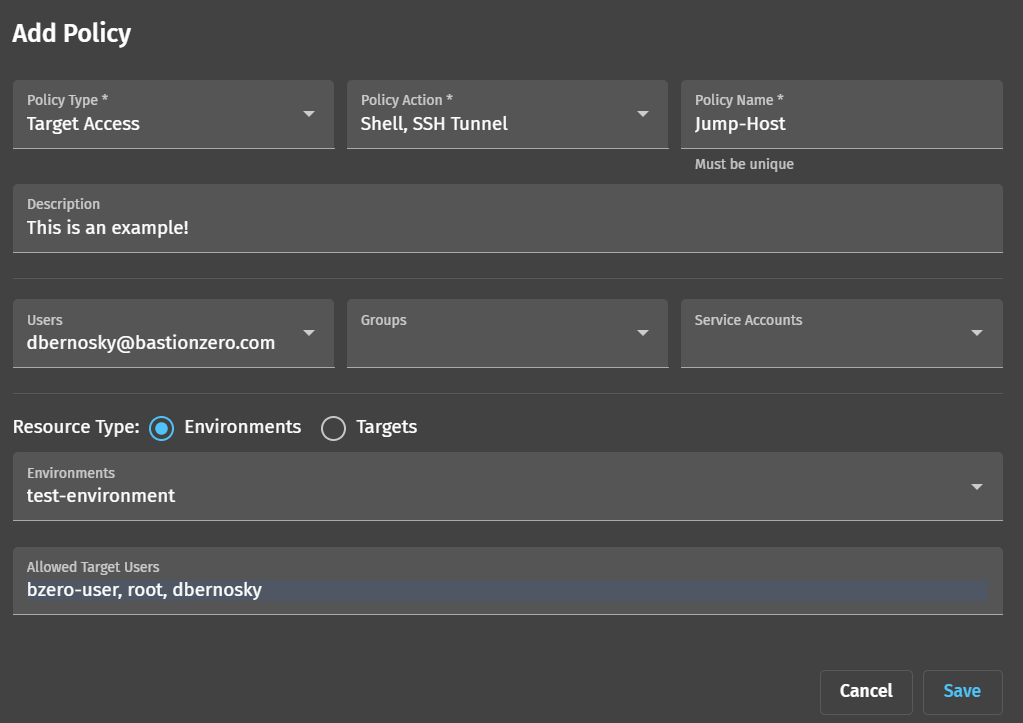
Click “Save”. You should now be ready to connect to our target!
Connecting to your BastionZero Target using the ZLI
Let’s head to our terminal and substantiate a connection to our new target. You can login to the ZLI using the zli login command.

Once you’re logged in, you should run the zli lt command to check which targets are registered.

Now we can substantiate a connection to our example-target using zli connect bzero-user@example-target.

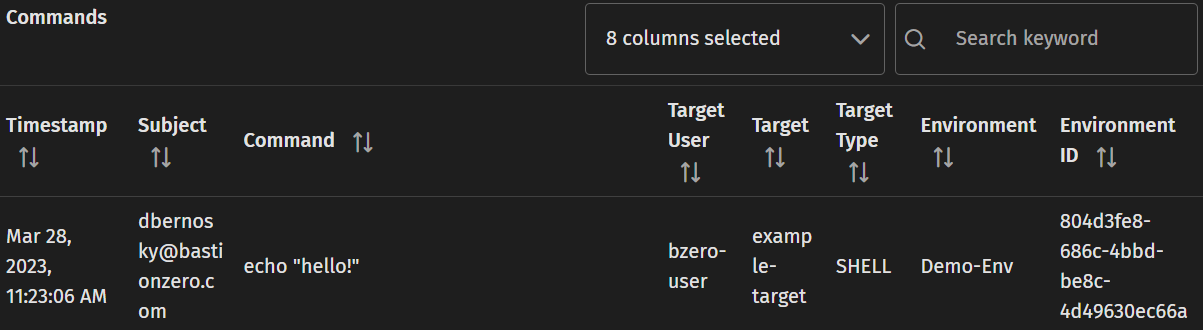
You should now be connected to your target! Run a few commands and then head to the logs page and verify that your commands are being captured.
Success! We’ve been able to gain access to the jump host through the ZLI. Next, we’ll want to try connecting to our target using a classic SSH tunnel. We’ll run the zli generate sshConfig command:

This inserts an Include statement into your /.ssh/config file:

which points at /.ssh/bzero-bz-config/:

Our /.ssh/bzero-bz-config/ file allows us to connect to any target which we’ve been granted access to by the “SSH Tunnel” action in Bastionzero policy. This means we can leverage existing SSH workflows and enables us to implement short lived SSH credentials managed by policy through BastionZero.
We can then substantiate a connection to our example target using the traditional ssh bzero-user@example-target. Note: SSH tunnels are opaque to BastionZero. As a result, unlike shells, BastionZero is unable to perform command extraction when using ssh tunnels. Commands will not appear in the BastionZero logs.

You can refer to the connection events log and see that a connection was made.

To use the BastionZero target as a classic SSH jump host, you can use the traditional ssh commands that instructs the jump server to establish TCP forwarding to the target server.

This SSH tunnel will be proxied through the BastionZero service, to your jump server, to the destination server. To make this even easier, you can update your /.ssh/config file to make it so you don’t need to type a long command every time.
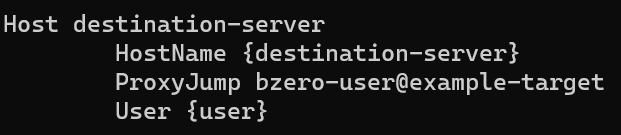
Replace {destination-server} with the hostname or IP address of the target behind the jump host you wish to be able to reach. Replace {user} with who you’d like to sign in as on the target behind the jump host. As an example:

If done correctly, this should allow us to run ssh destination-server and substantiate a connection through the BastionZero jump host with an abbreviated command. More information can be found here. We’ll cover additional advanced SSH configuration in a future series.


